Pressure Test a Radiator and Radiator Cap
As the coolant in your cooling system increases in temperature, the pressure in the system also increases. Normal operating temperature of a cooling system is around 220 degrees Fahrenheit, which is slightly higher than the boiling point of water. The pressure of a cooling system is controlled by the radiator cap which generally holds the pressure of the system between 6-16 PSI and keeps the temperature in check.
FJC Radiator and Radiator Cap Test Kits come with everything you will need to pressure test most vehicles (including the caps). In order to pressure test the cooling systems of specific vehicle makes and models, appropriate manufacturer adapters are required.

Using an FJC radiator test kit:
(1) Make sure the cooling system is not hot. Carefully touch a radiator hose to determine its temperature . Keep in mind that if the system is hot, extreme pressure and heat are at play. Do not attempt to remove the radiator cap while the system is hot, or injury may occur.
(2) Remove the radiator cap. If the radiator hose is cool to the touch the motor has cooled down and you can remove the radiator cap. Despite the cooler hose temperature, however, extreme care should be paid as there may still be hot pressurized coolant in the system.
(3) Place a catch pan under the radiator. Coolant may come out when you remove the radiator cap, so it’s best to be prepared for this possibility.
(4) Attach the radiator cap to the pressure tester adapter.
(5) Attach the adapter with the installed cap onto the pressure tester.
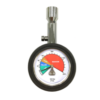
(6) Pump the pressure tester handle until the pressure builds to the manufacturer’s specification. It may lose some pressure, but should not rapidly lose a good amount.
(7) Install the old cap if it is still good, or if necessary buy a new radiator cap. Make sure you know the year, make, model, and engine size before you head to the parts store. (It is good practice to bring the old radiator cap with you to be sure you are purchasing the correct part.)
LMK 2019
